

What Is Autoarchive Folder And Why Do We Need Them
Autoarchive folders essentially help manage the space in your mailbox by automatically moving older items from your mailbox to a PST file stored on your computer. Depending on the settings you choose in the autoarchive settings box (shown further down this page), items are either archived to a PST file or permanently deleted based on how old they are. You can find more information on the settings found in the autoarchive box within Outlook by visiting the Microsoft website.
You could potentially run out of space quickly if an AutoArchive folder is not enabled or correctly configured in your Outlook settings, by ensuring that older items are archived after a certain time has passed will prevent your older emails from clogging up your mailbox.
Setting Up An Autoarchive Folder In Outlook
Firstly, launch Microsoft Outlook on your computer, and ensure that you are using a version that supports archiving, such as Outlook 2010, 2013, 2016, or 2019.
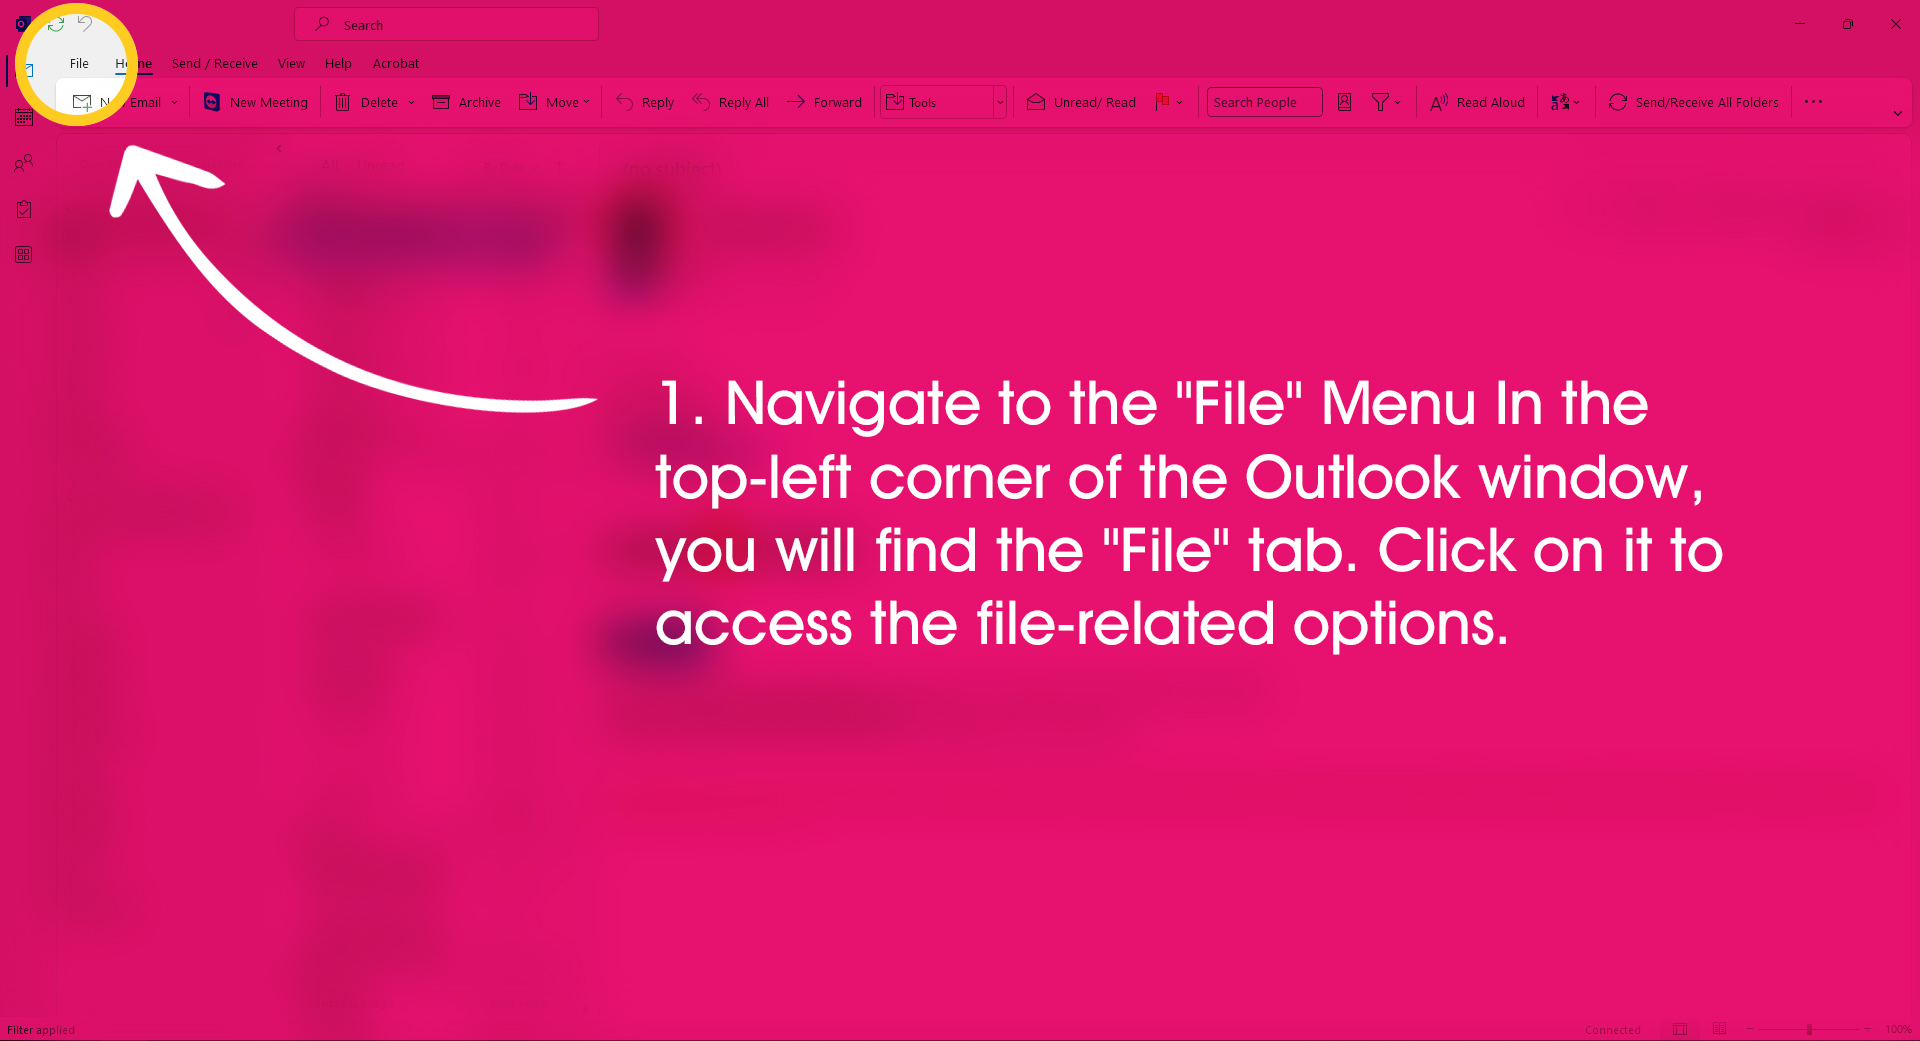
Step 1:
Navigate to the “File” Menu In the top-left corner of the Outlook window, here you will find the “File” tab, click on it to access the file-related options.
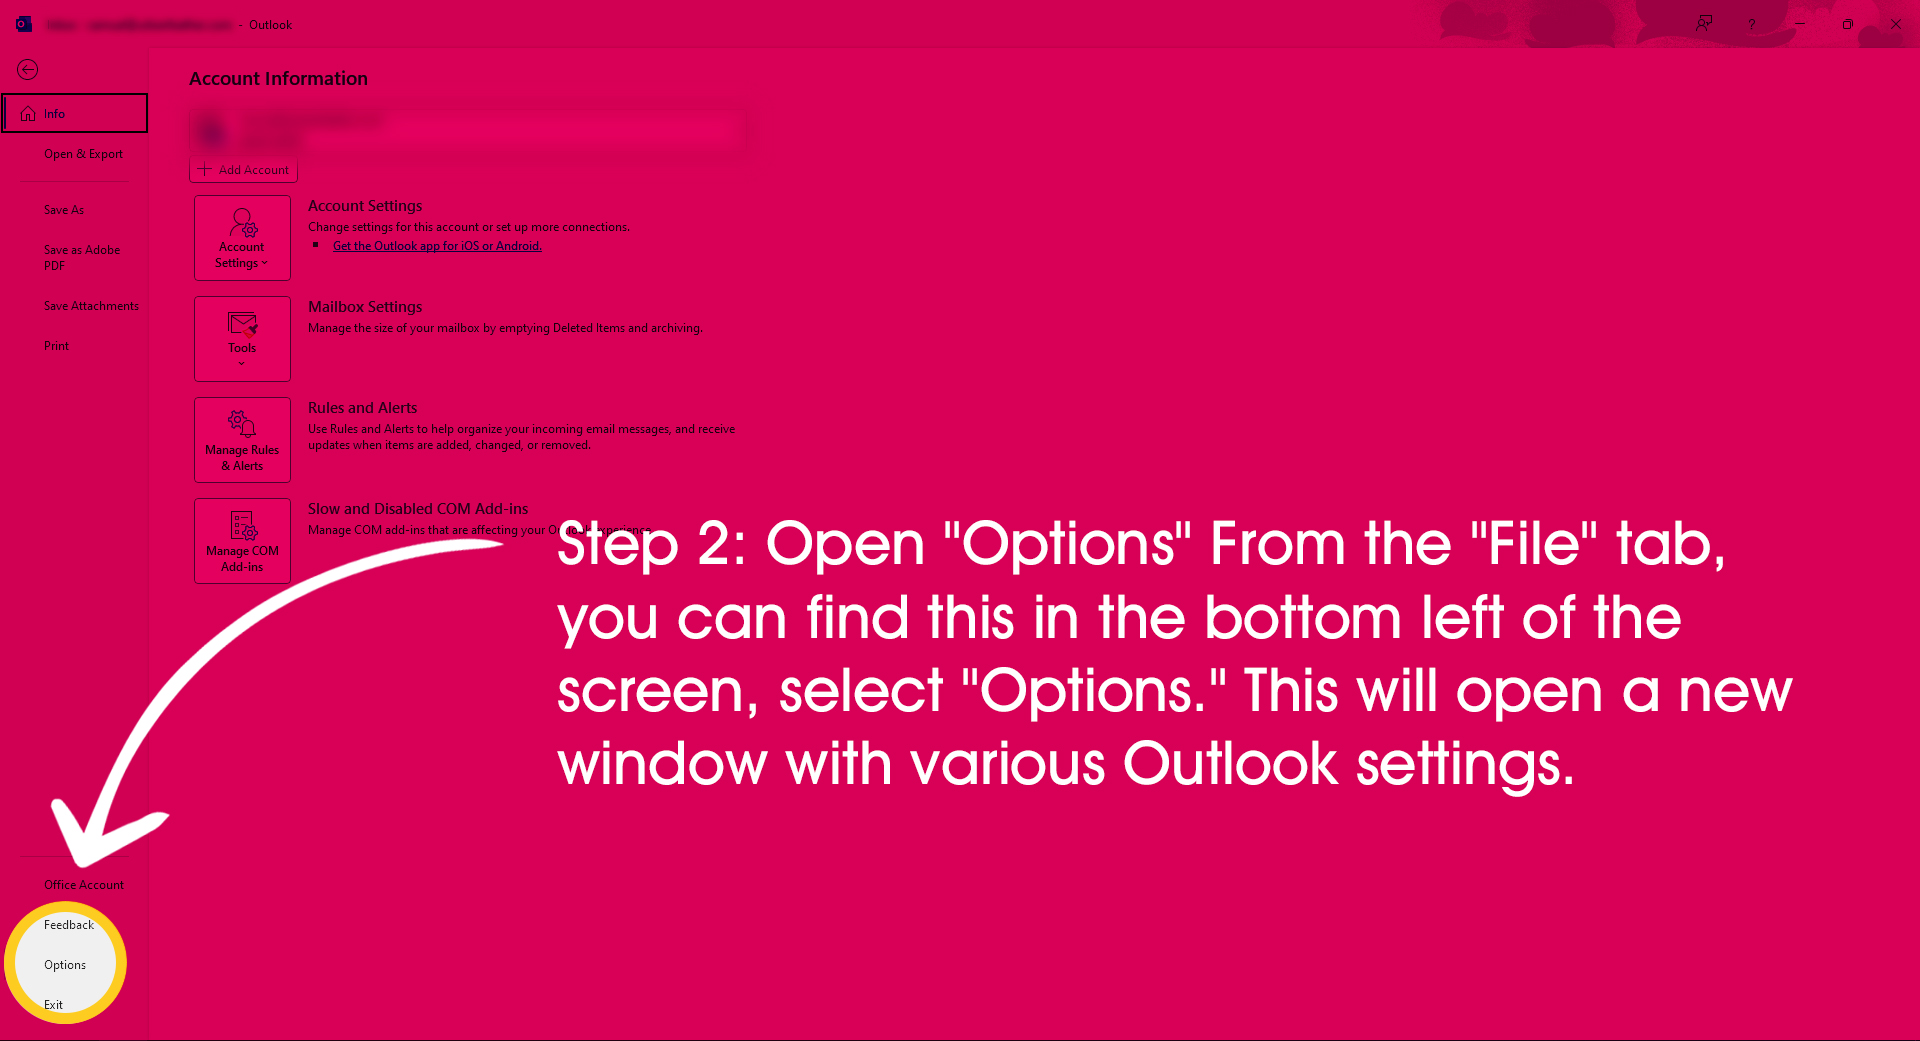
Step 2:
Open “Options” from the “File” tab, select “Options.” This will open a new window with various Outlook settings.
Step 3:
Access the “Advanced” options In the Outlook Options window, locate and click on the “Advanced” tab on the left-hand side. This will display advanced settings for Outlook.
Step 4:
Find the “AutoArchive” settings by scrolling down in the Advanced settings until you see the “AutoArchive” section. Click on the “AutoArchive Settings” button.

Step 5:
Configure Archive Settings: The AutoArchive window will appear, here, you can adjust various settings related to archiving.
- To enable archiving for all folders, make sure the “Run AutoArchive every” checkbox is checked.
- Specify the number of days in the “Clean out items older than” field. This determines how old items need to be before they are archived.
- Choose the folder where you want your archived items to be moved to by clicking the “Browse” button next to “Move old items to.”

Step 6:
Additional Options: You can further customize the archiving process by clicking on the “Show archive folder in the folder list” checkbox. This will make the archive folder visible in the Outlook folder list on the left-hand side.
Step 7:
Apply Settings and Close Once you have adjusted the settings to your preference, click the “OK” button in the AutoArchive window. Then click “OK” again in the Outlook Options window to close it.
Congratulations! You have successfully set up an archive folder in Microsoft Outlook. The program will now automatically move older items to the specified archive folder according to the settings you configured.

I must admit that Jamie and Richard have been tremendous. They have tried to explain everything to me and I have pretended that I understand. The point is though, it doesn’t matter that I do not understand how everything works because I know without a shadow of a doubt, they do.
Maria Portess, Director, Brigg Windows & Conservatories


+44 (0) 1724 897 497
[email protected]